A Quilt Without a Home

I spent a lot of time this week thinking about fabric choices, my own quilt aesthetic, and why my brain cannot handle color.

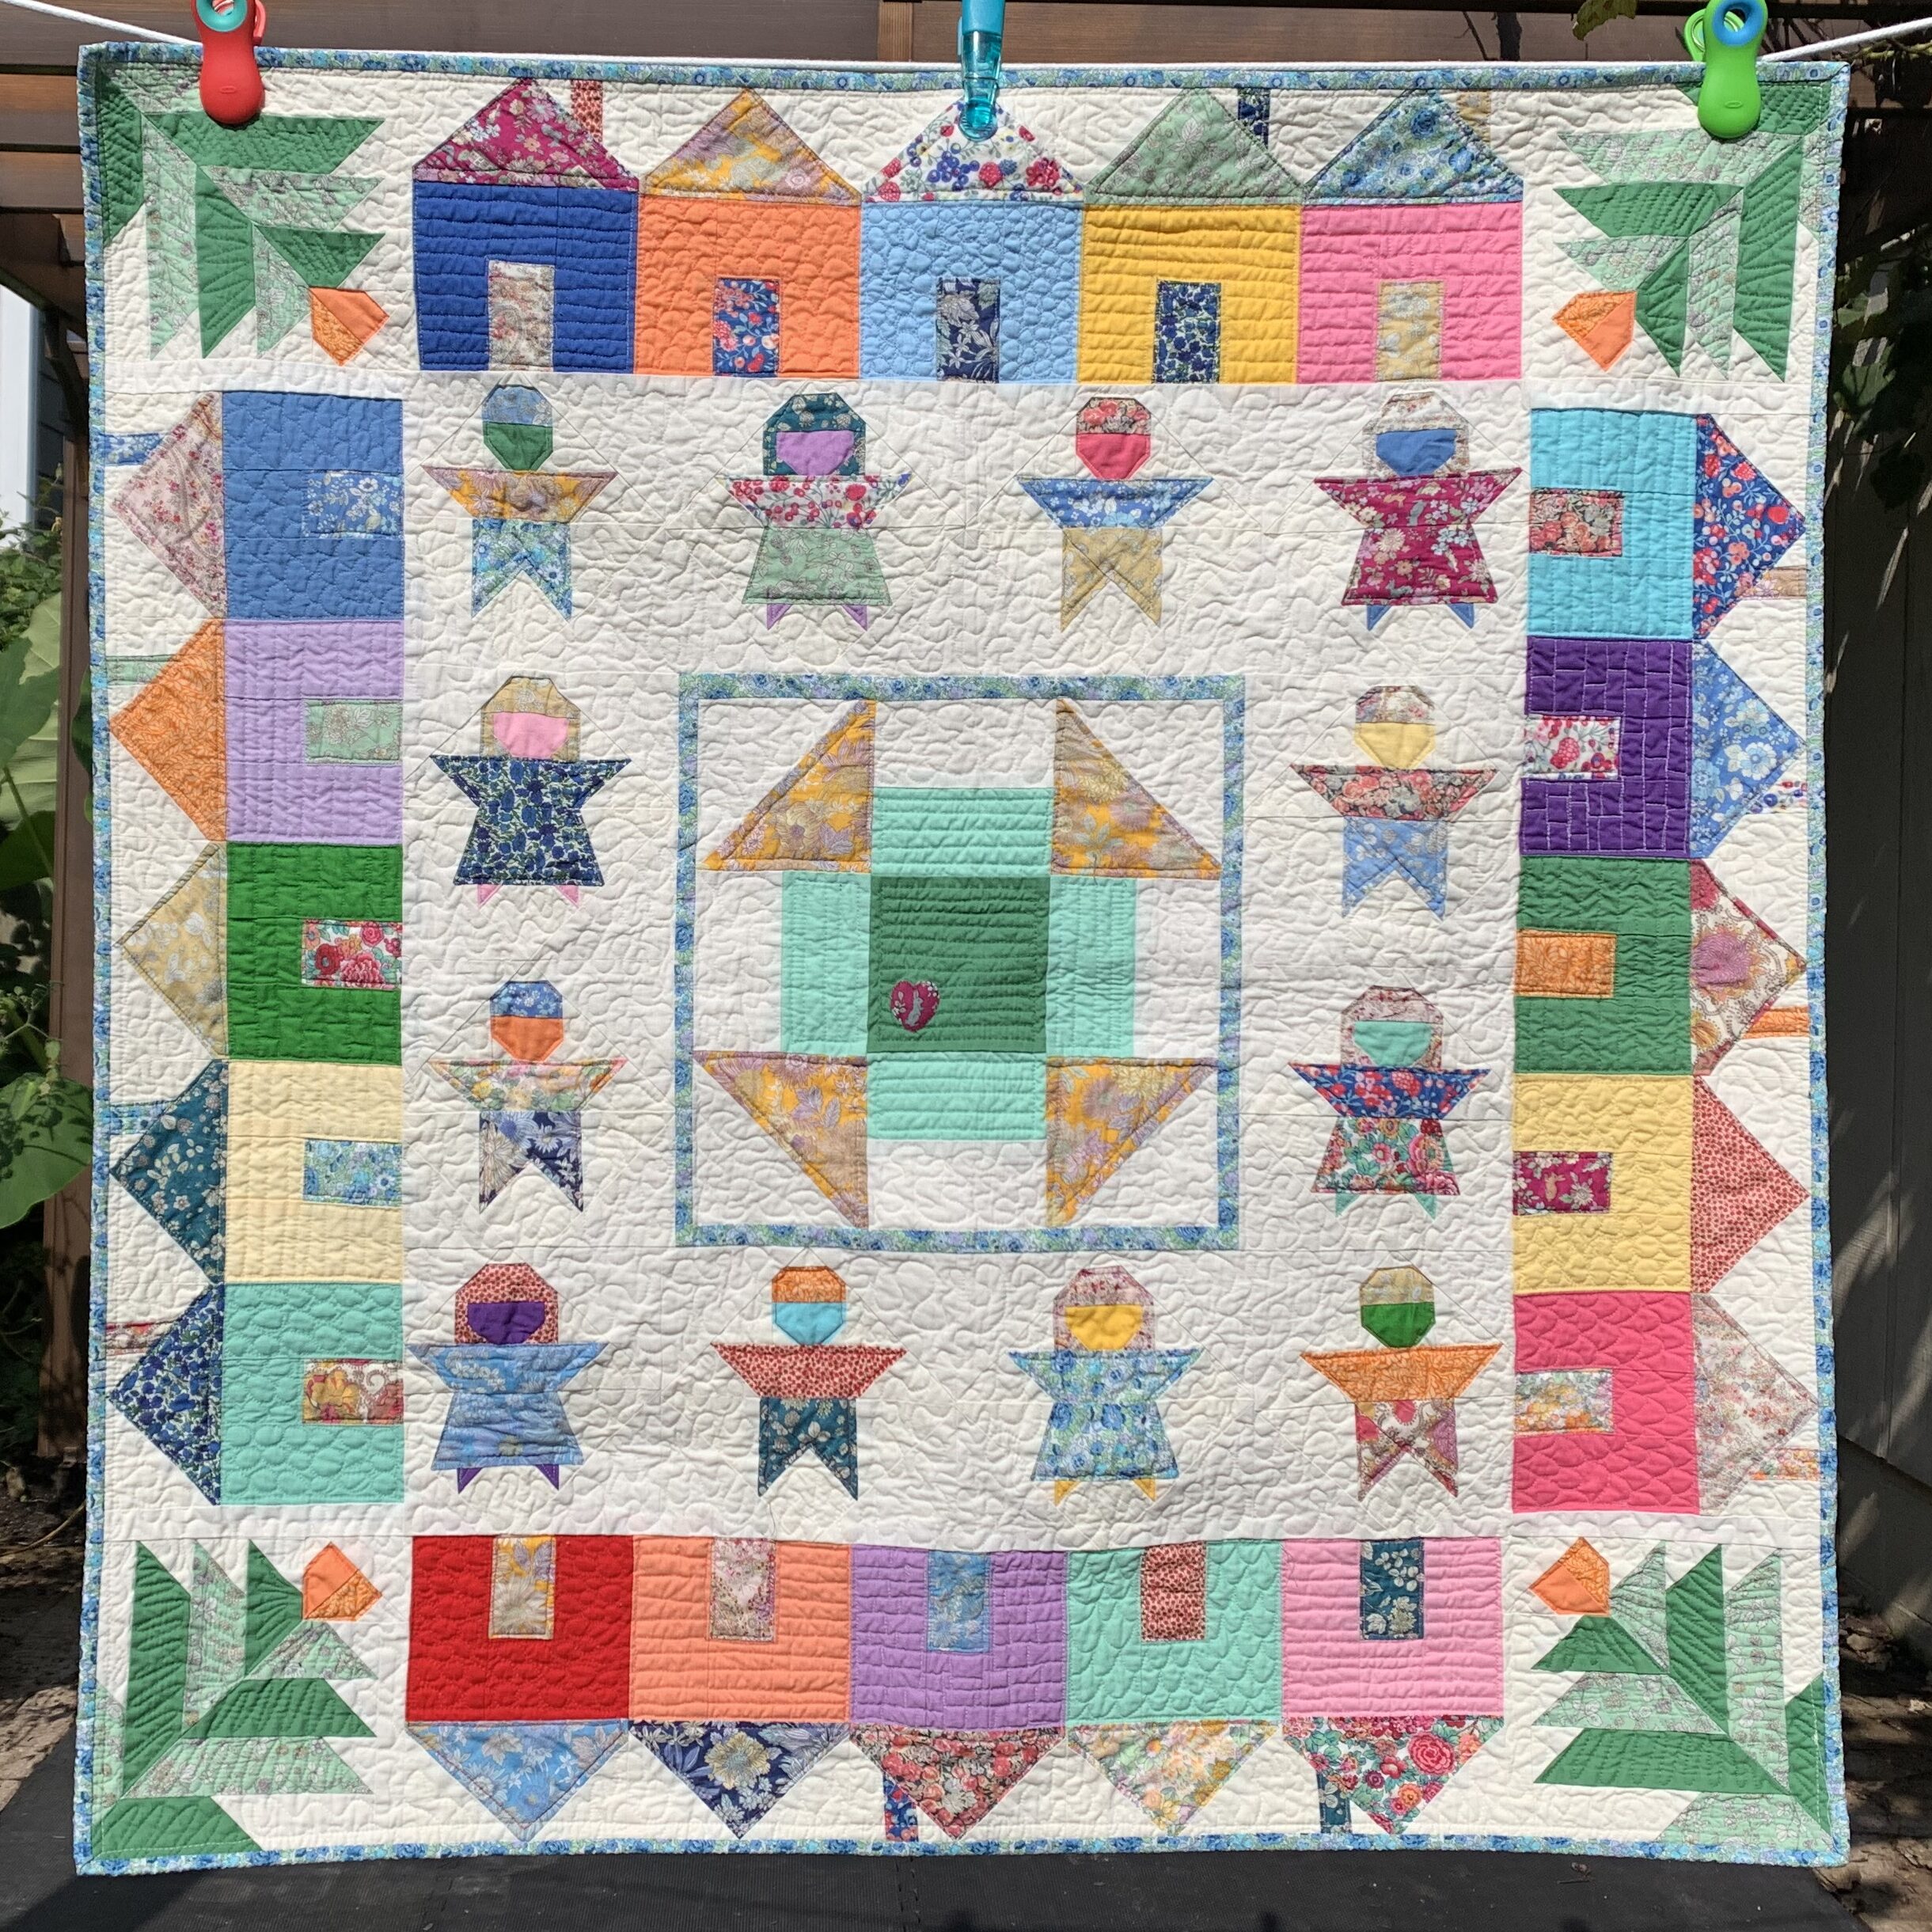
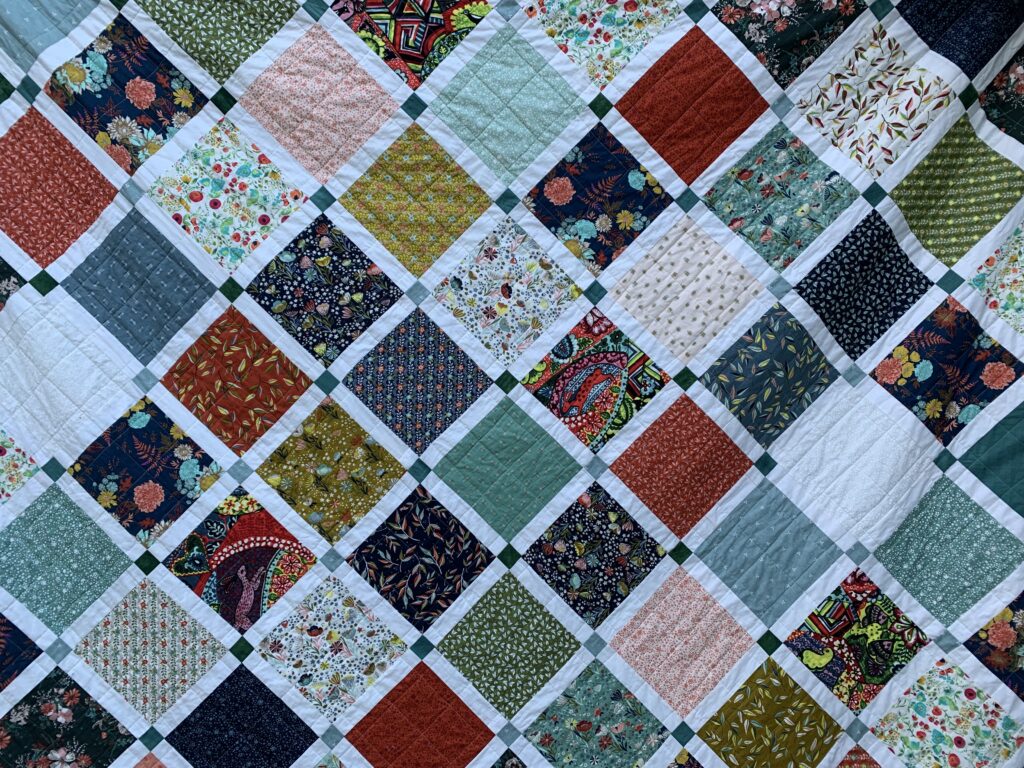
I got excited about Amy Smart’s Gratitude Quilt and she generously offered a free pattern. The pattern is a simple, fast sew that uses pre-cuts. After making a few quilts that made me think a lot, I told Rachel: “Give me shortcuts and pre-cuts!”

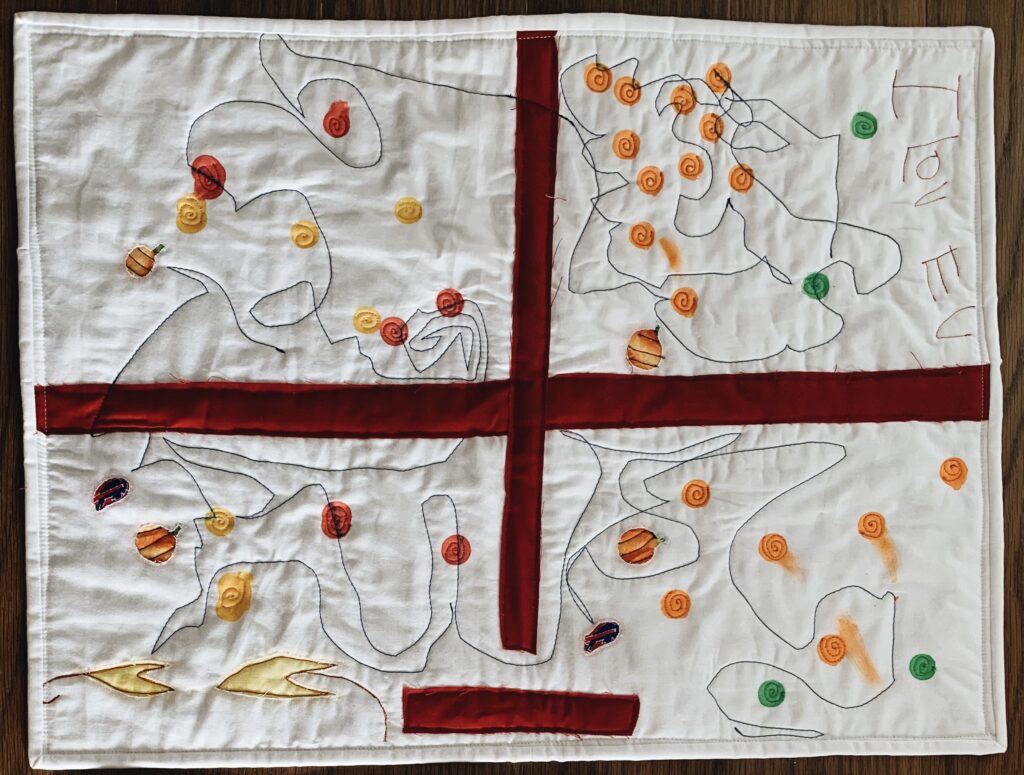
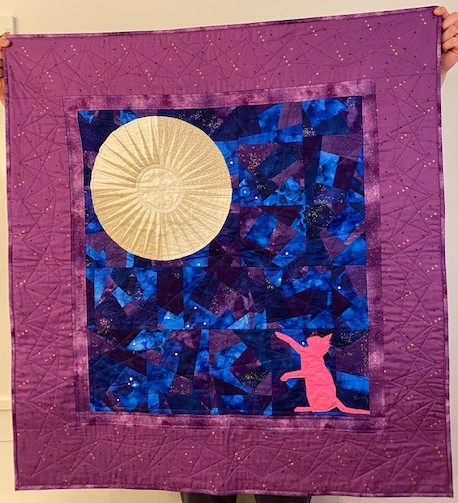
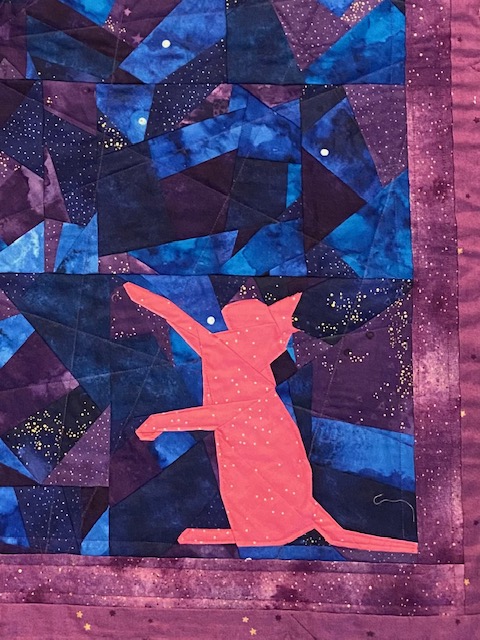
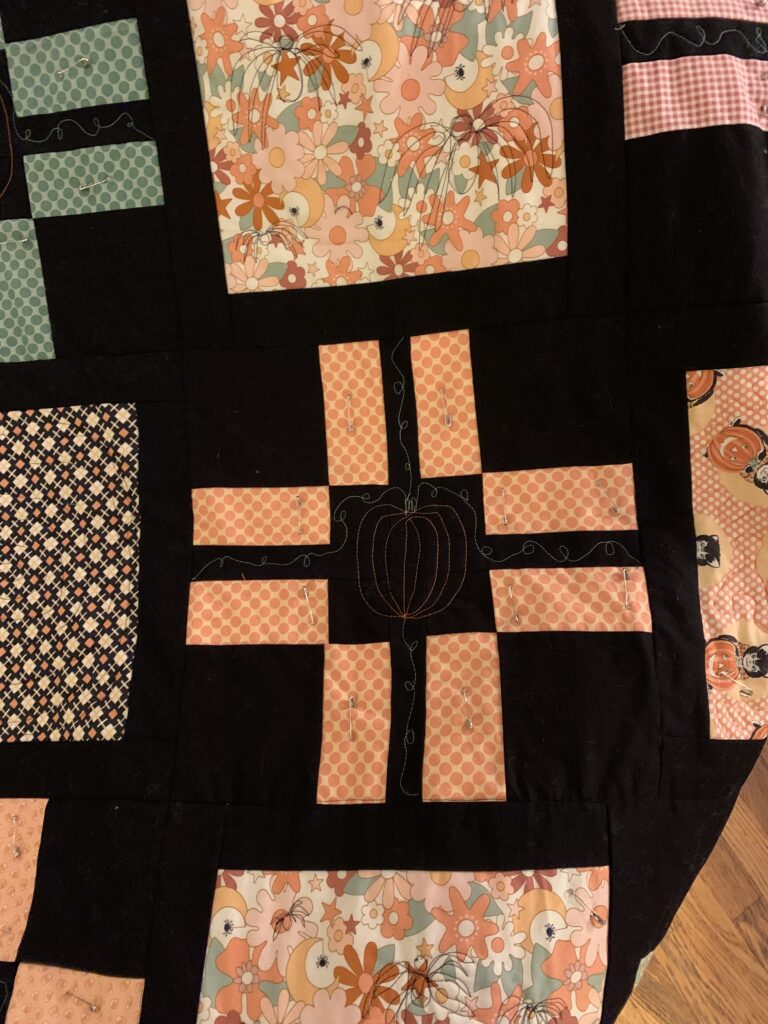
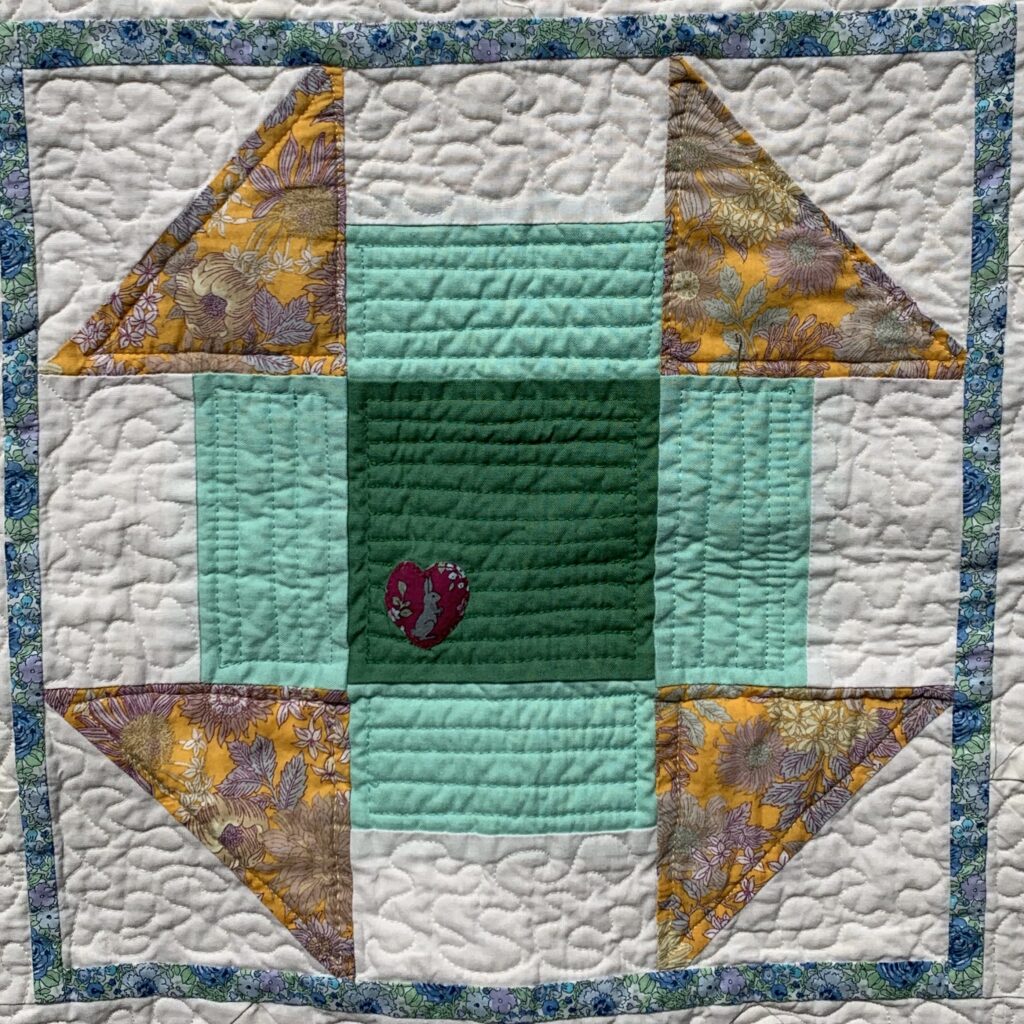
In Amy’s original quilt from this pattern she embroidered words expressing things she is grateful for:

Photo from Diary of a Quilter by Amy Smart

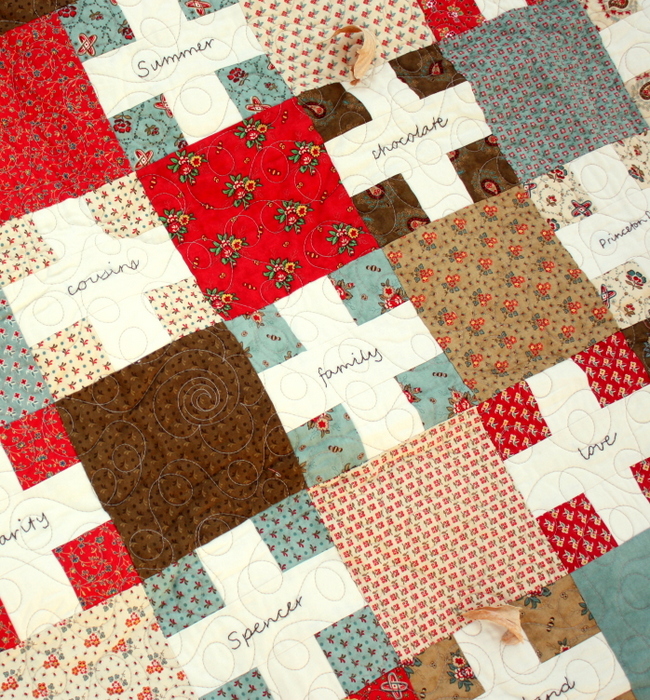
My plan was to have Louie write things he is grateful for and then I would embroider over his writing. I wanted to do this over the course of the next year and finish the quilt for next Thanksgiving, but I started to realize even that was going to be ambitious. I imagined myself cajoling Louie into writing words and then I would be embroidering 40 some blocks that say “monster trucks” and “the Buffalo Bills.” (Side note: my first ever attempt at quilting was derailed because I was trying to embroider all of the blocks. I got to three and quit.)

Then, enter the fabric choice conundrum. I actually think I am pretty good at choosing fabric when I am making a quilt for someone else. However, I have never made a quilt for myself or for my own house (outside of Louie’s bedroom). I realized why — I am bad at choosing fabrics for my own quilts. Is this a problem that anyone else has?

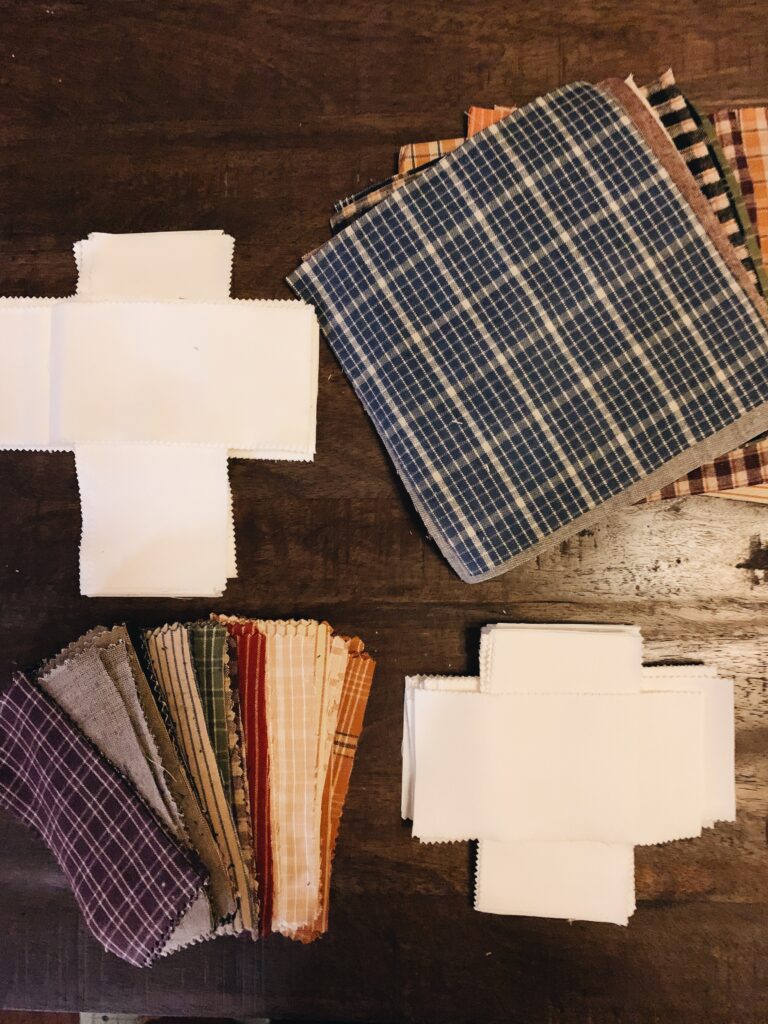
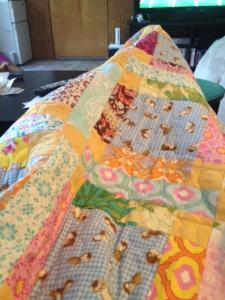
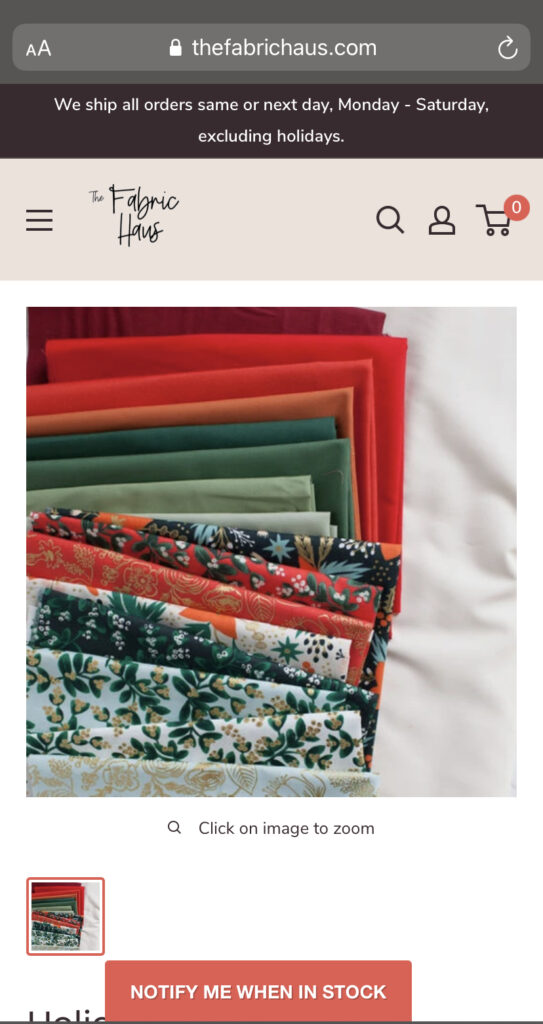
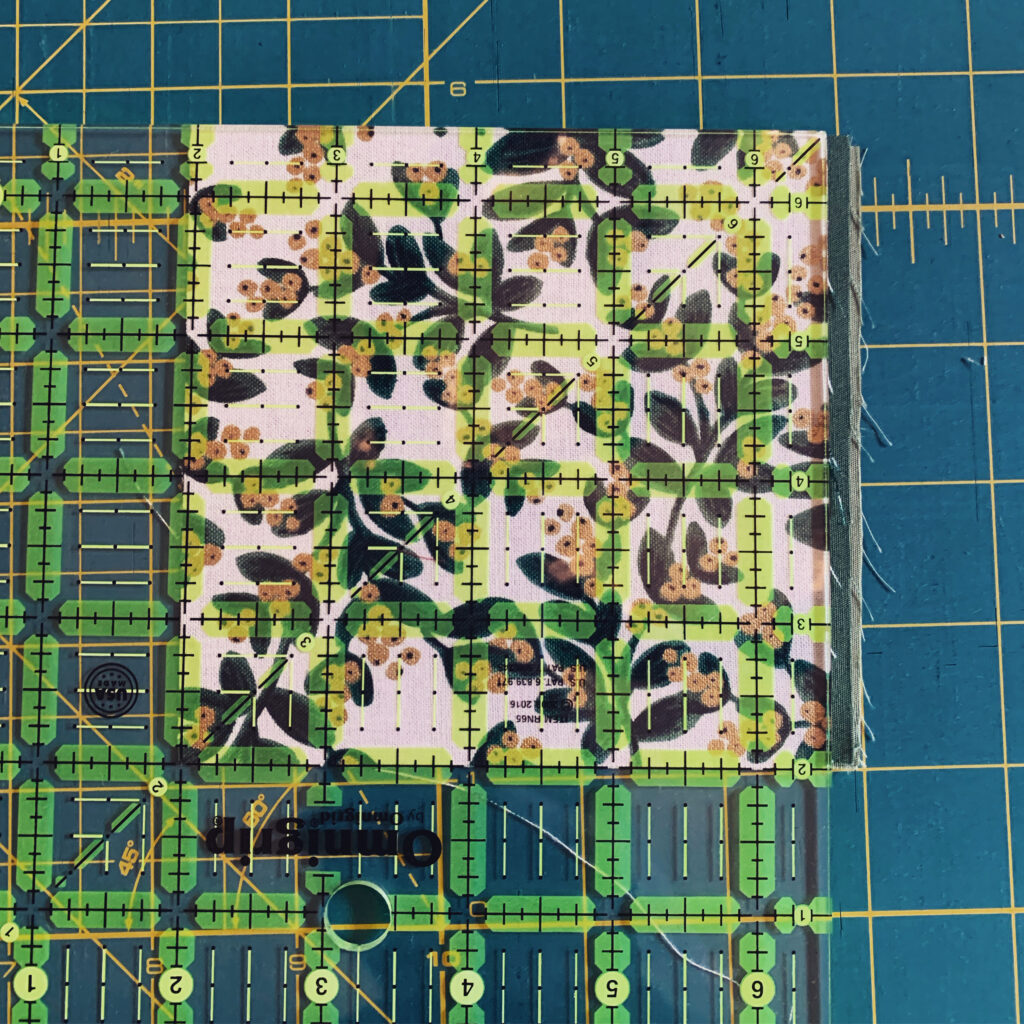
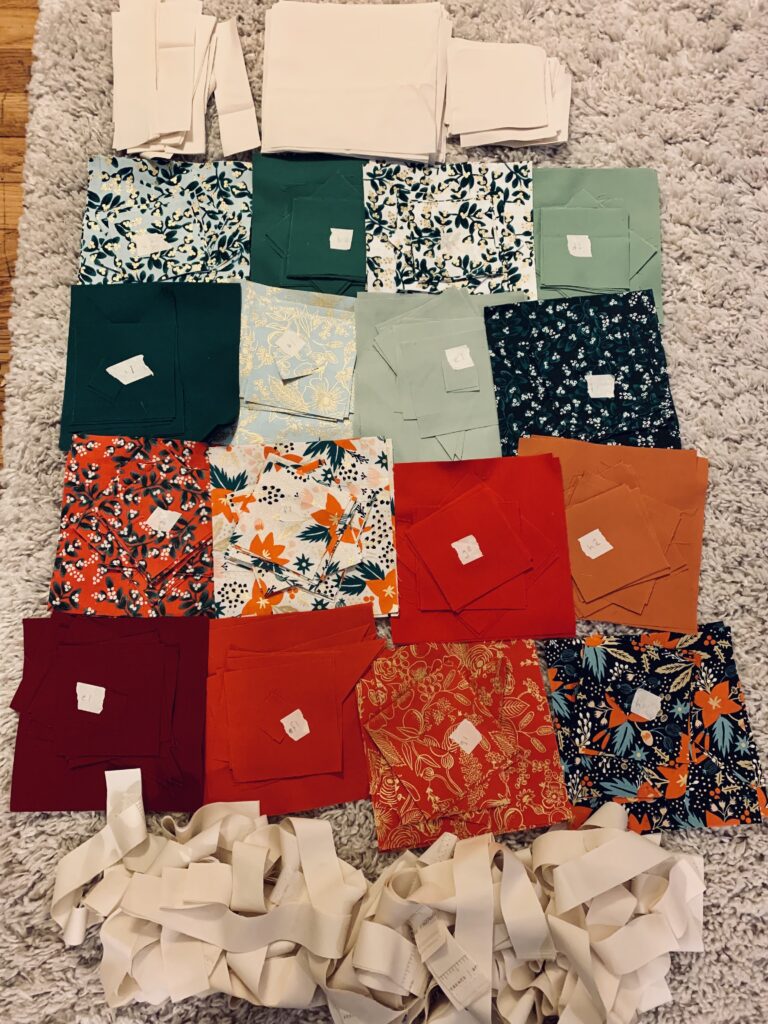
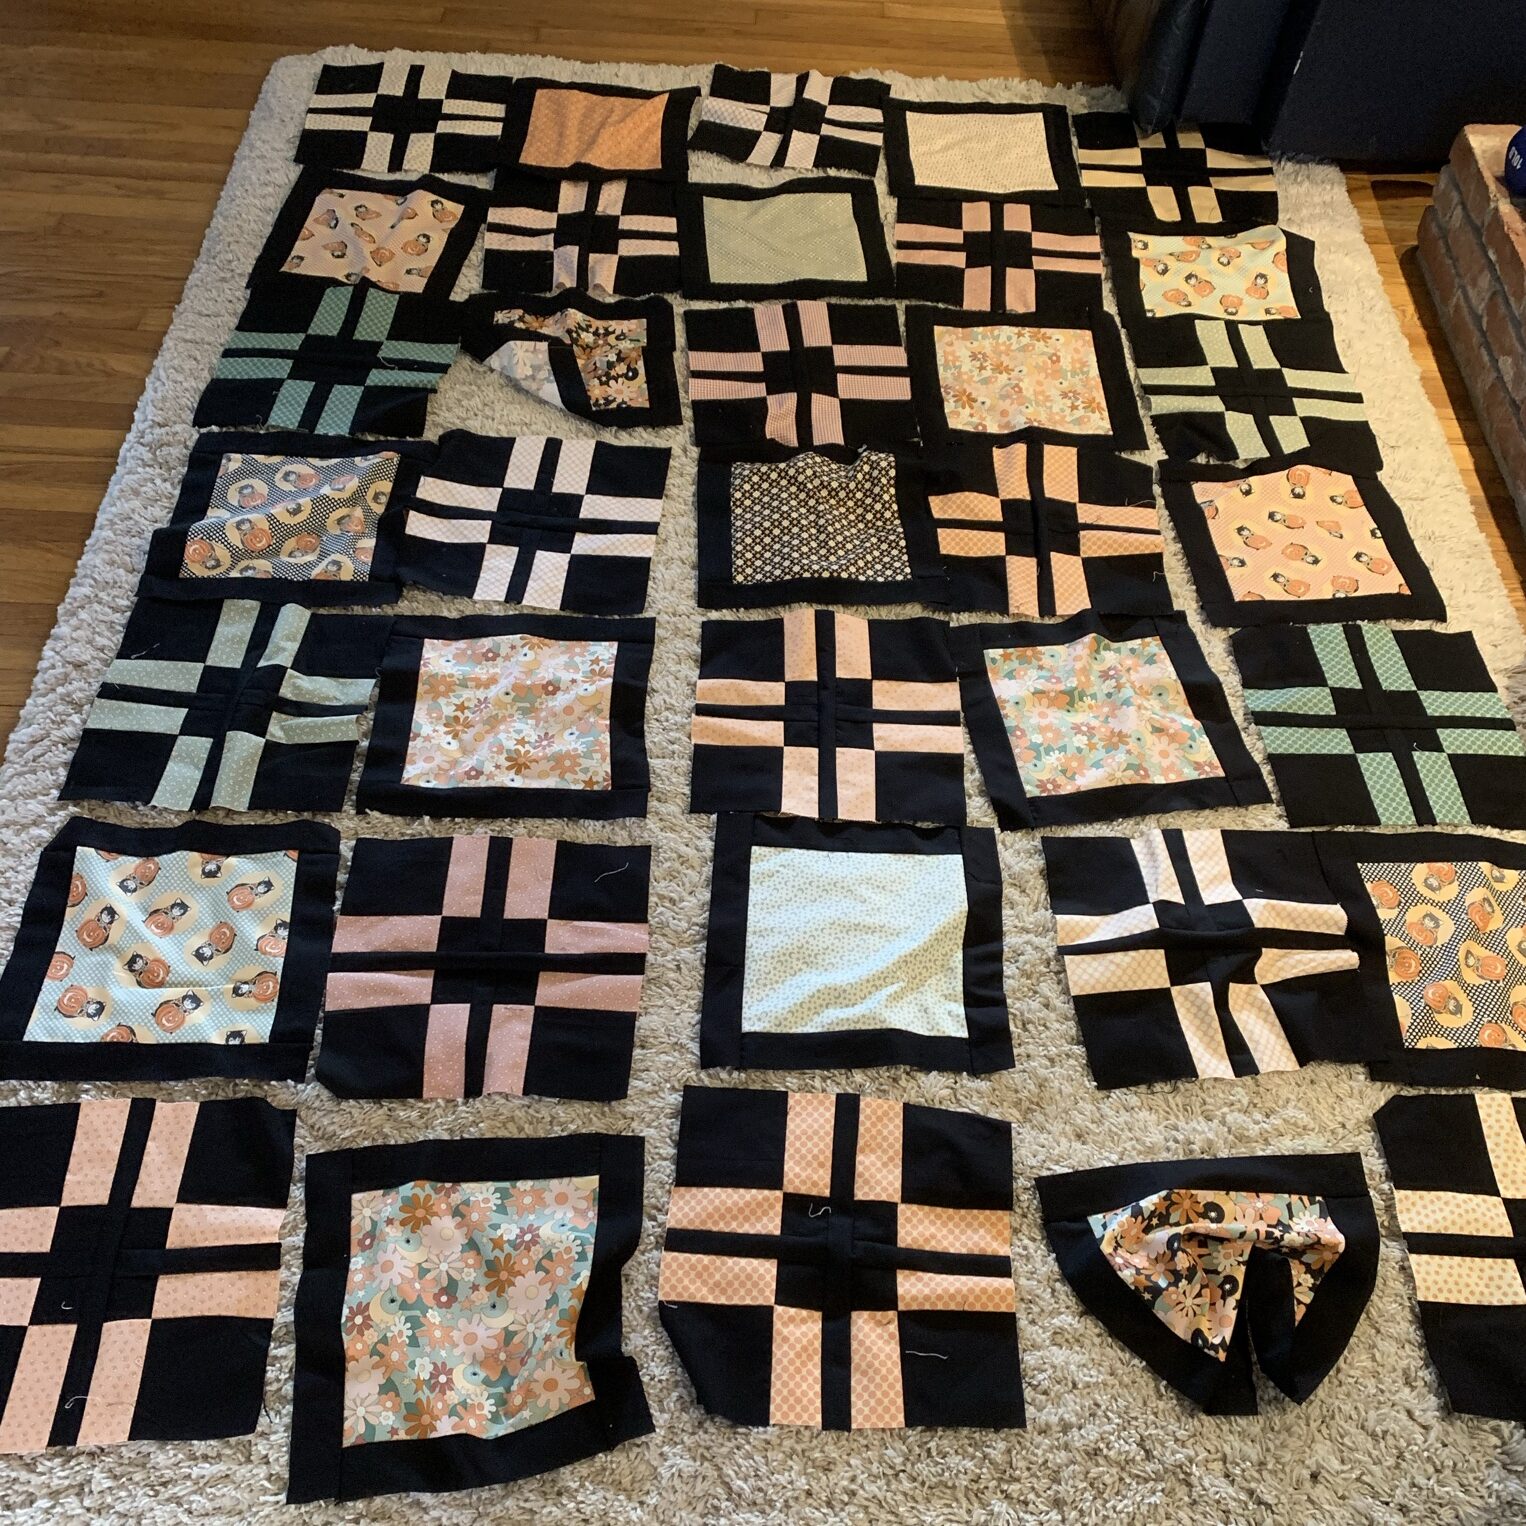
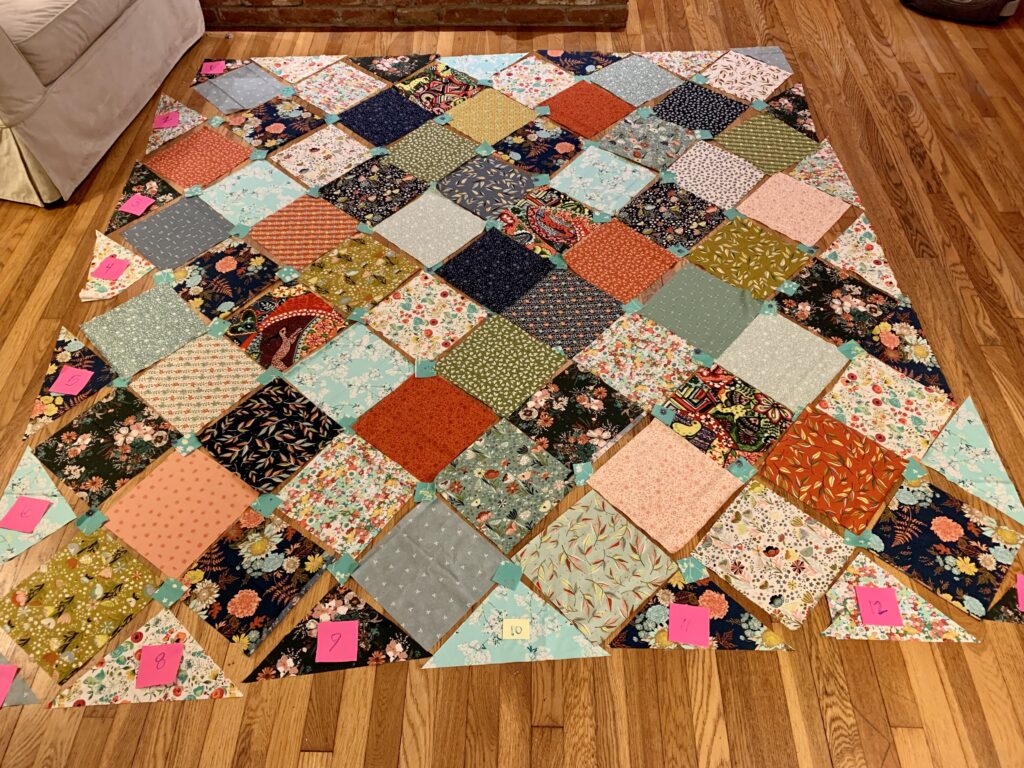
For this Gratitude quilt, I bought a charm pack and a layer cake called “Homemade Homespuns” from Fat Quarter Shop.

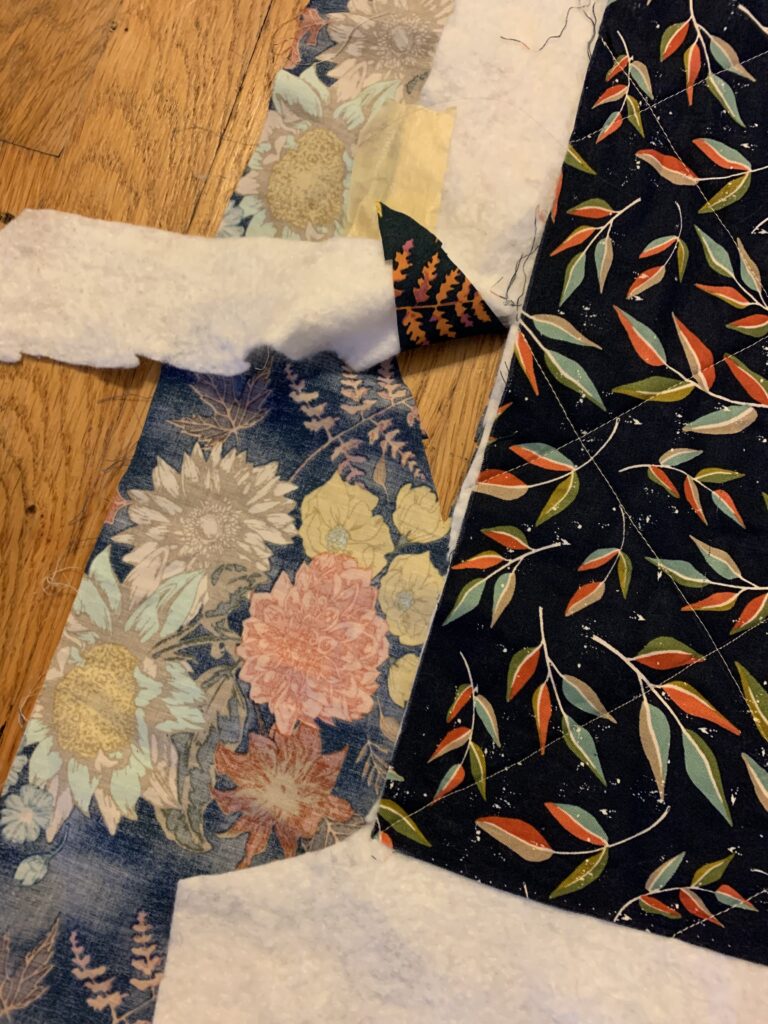
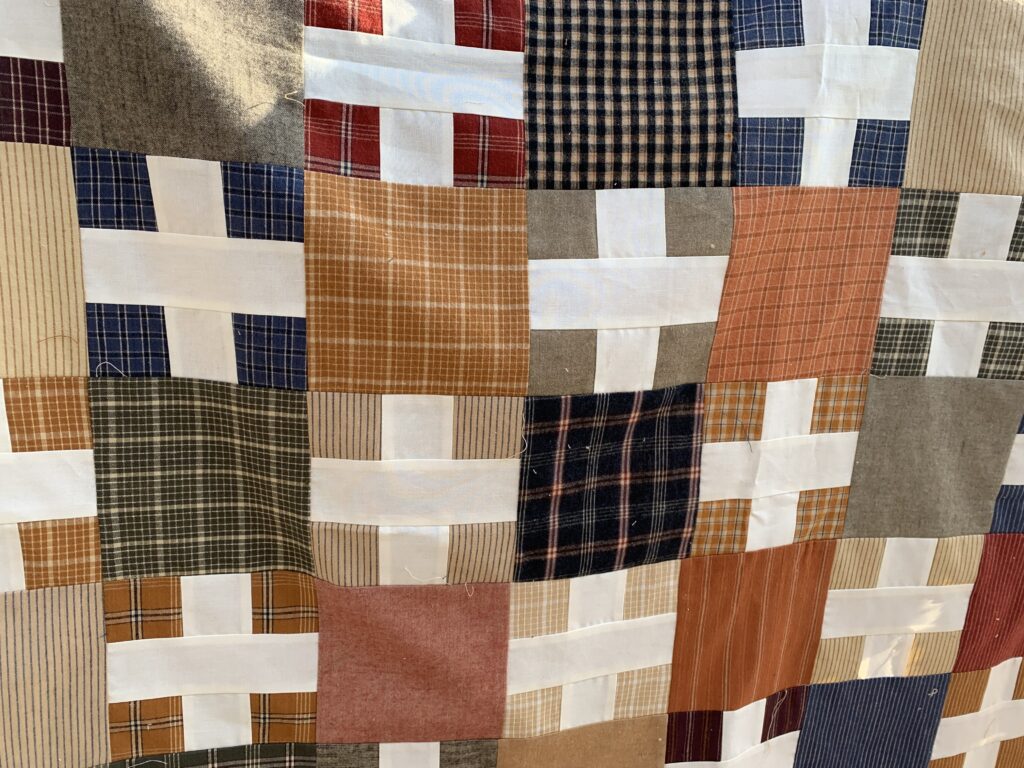
As I started to assemble the top I realized I do not like this fabric choice for my own house. I was listening to an episode of the American Patchwork & Quilting podcast called “Find Your Signature Color Palette” and I realized that my signature color palette for my own house is — no color. Therein lies my problem. I seem to forget my preference for neutrals when I start making a quilt for myself. Making a colorless quilt might seem sad to some people and it is limiting when there is so much beautiful, colorful fabric out there. But, I am excited about the challenge of making I quilt that I actually want to put in my house.

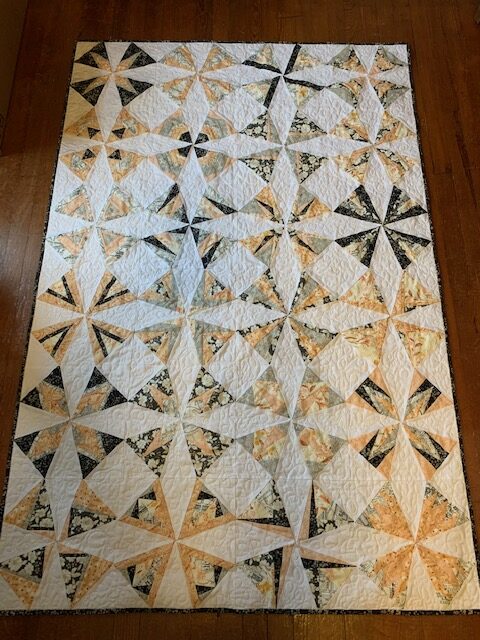
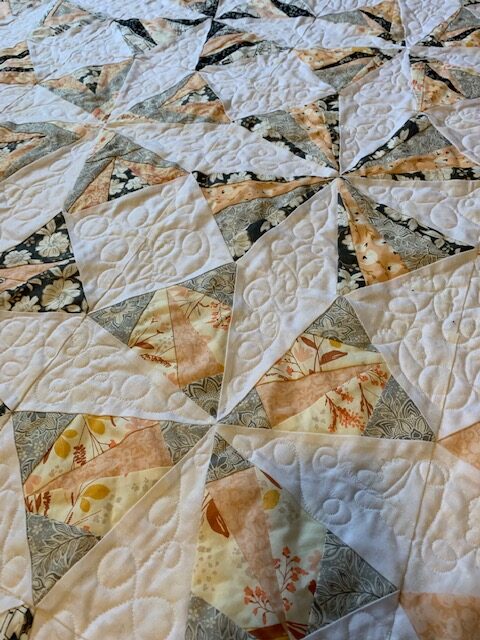
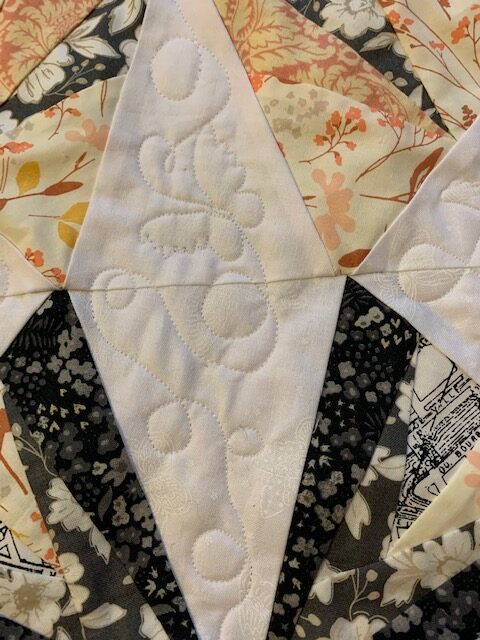
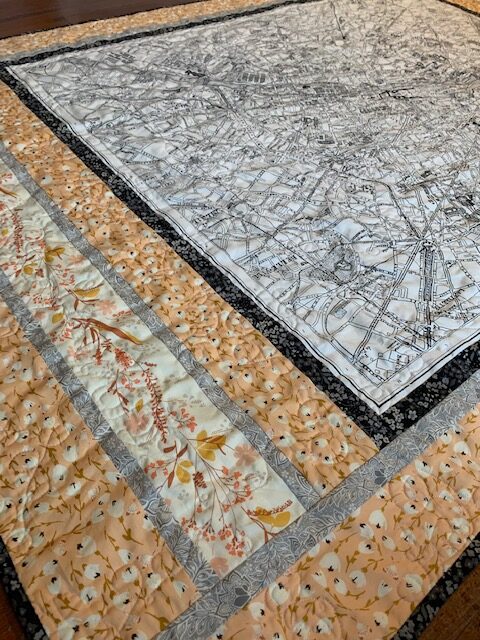
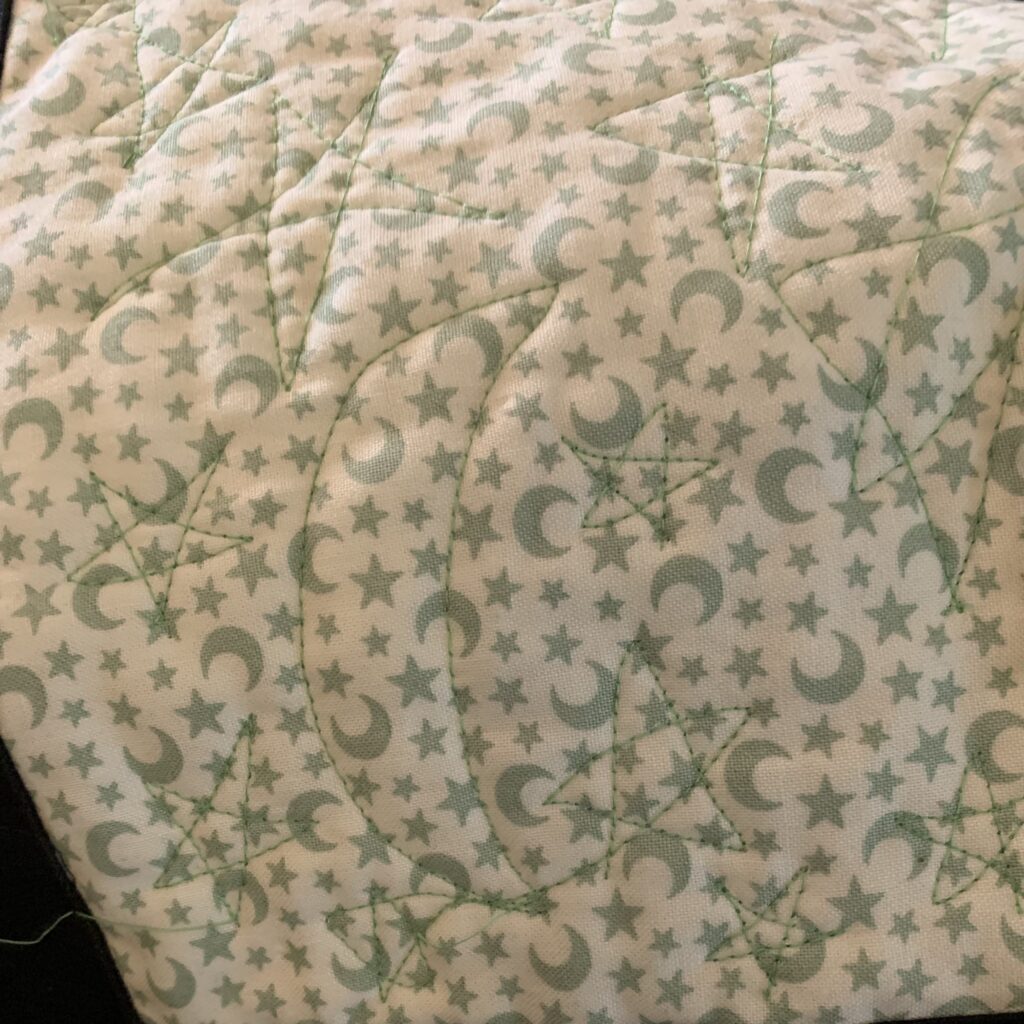
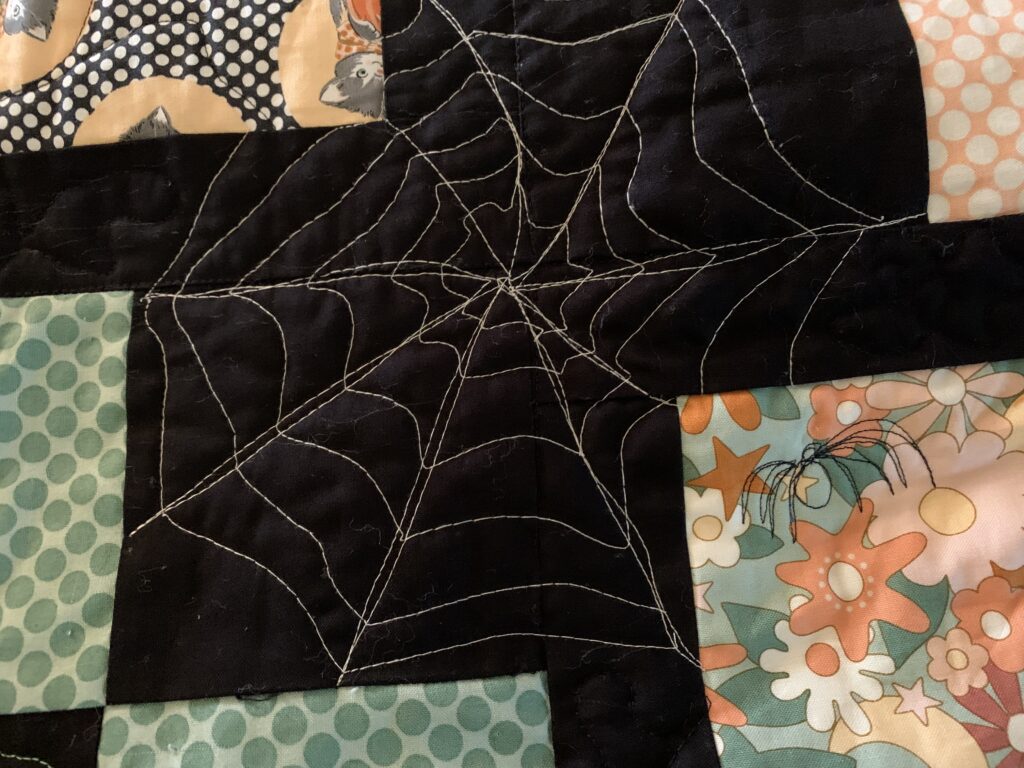
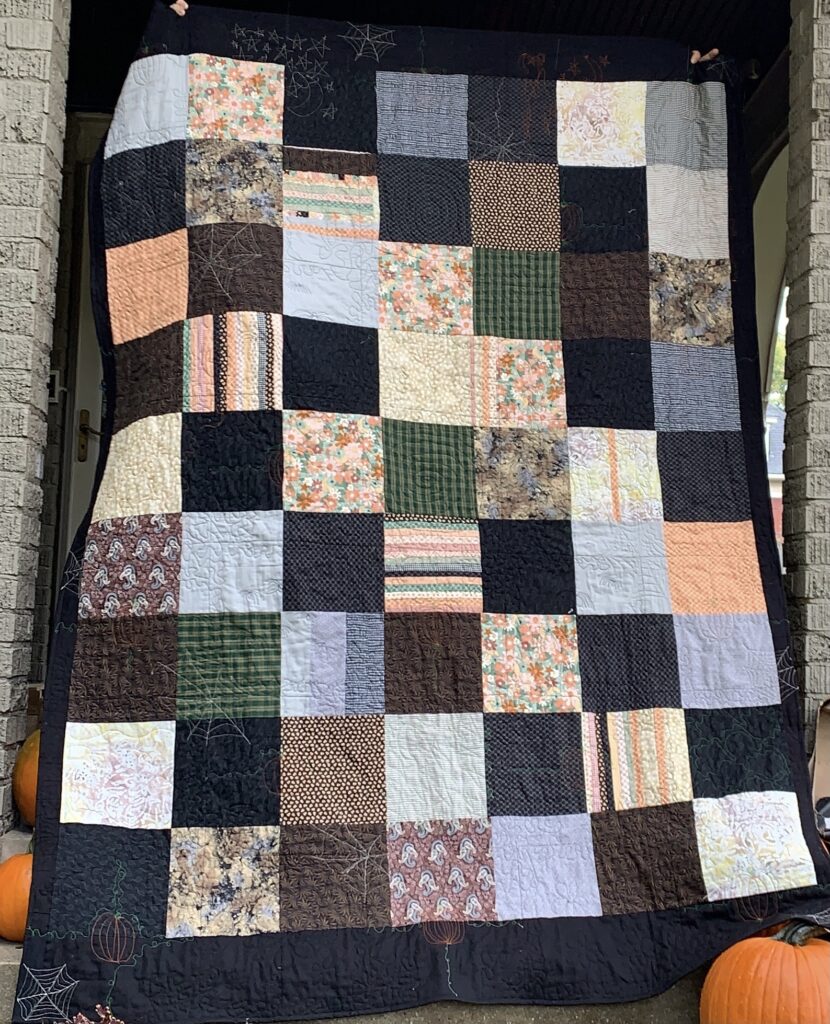
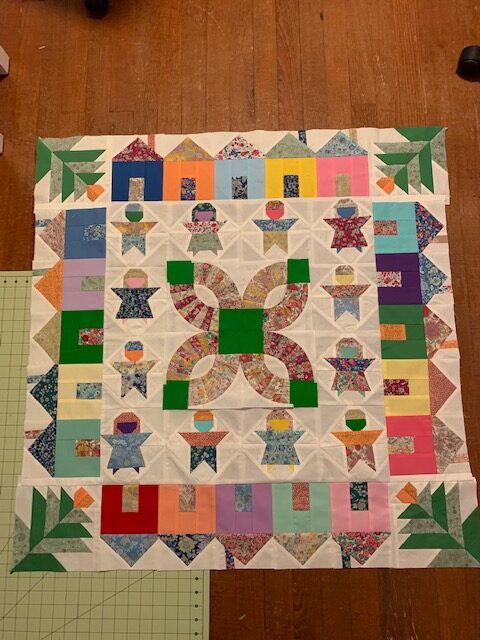
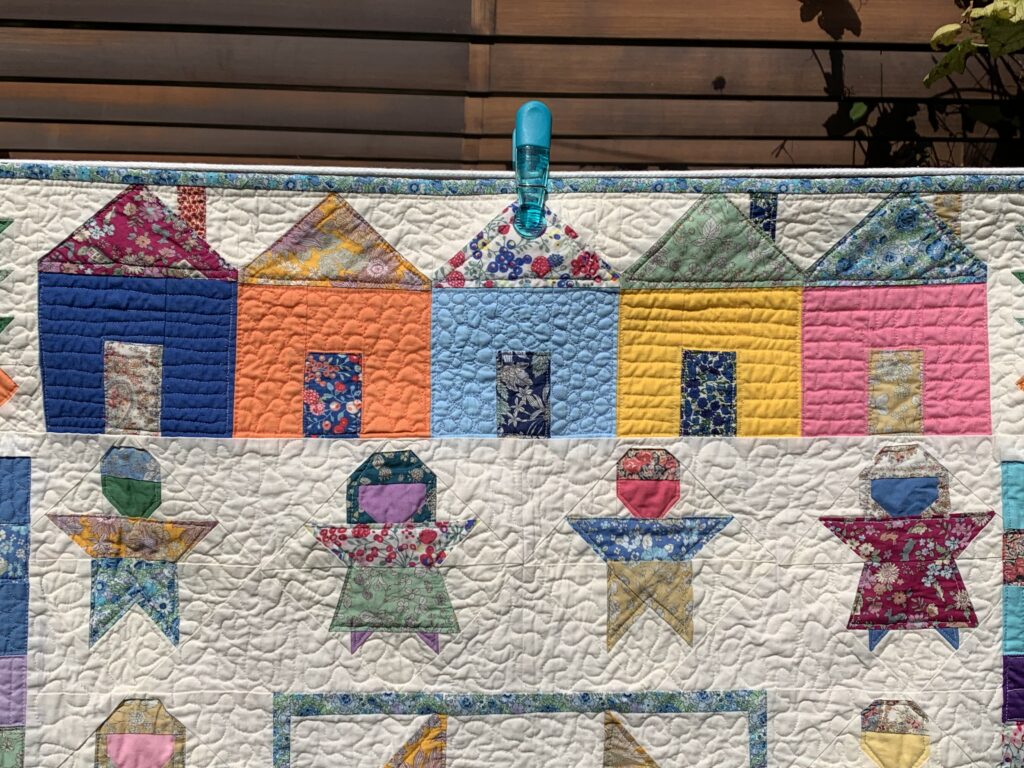
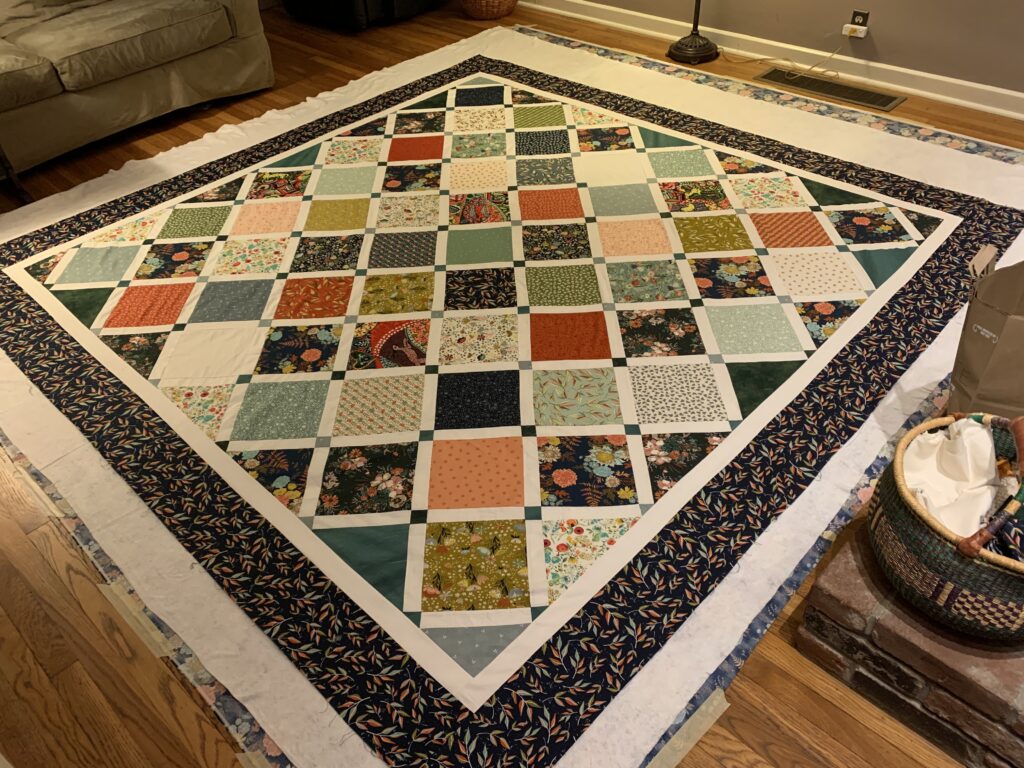
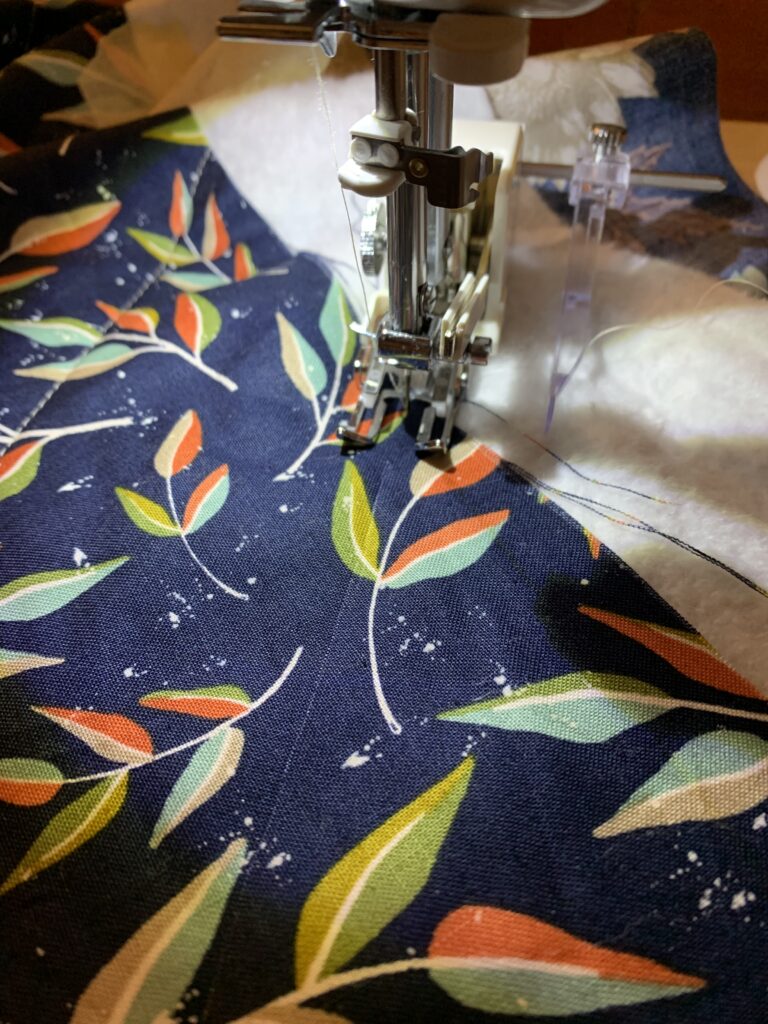
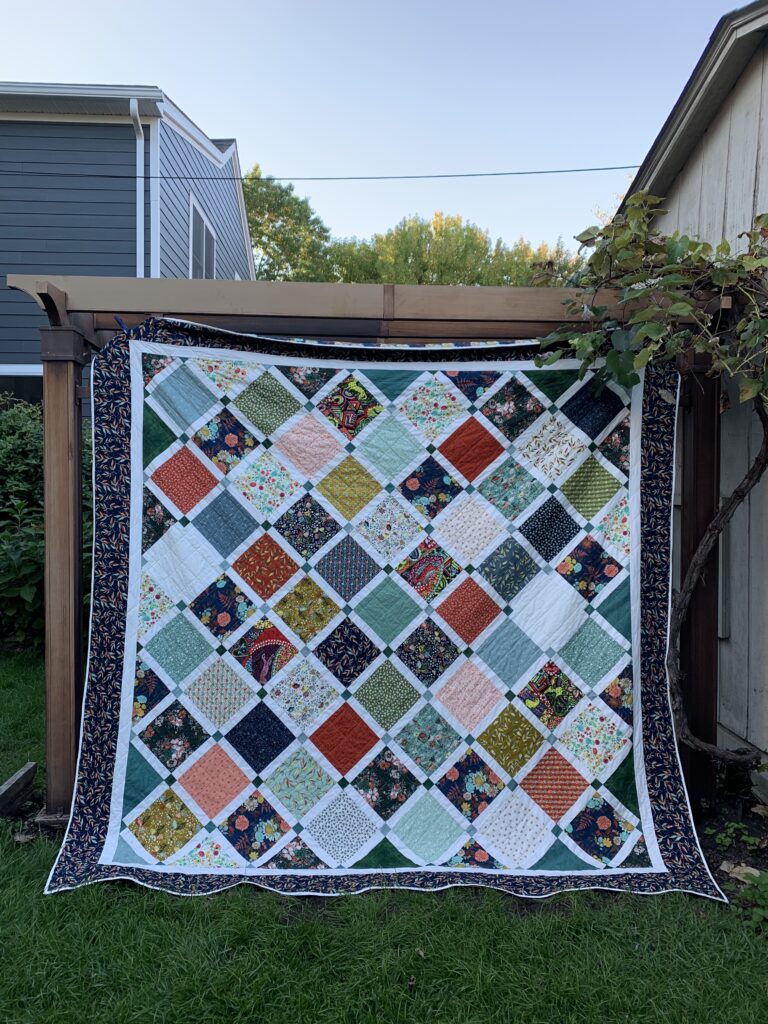
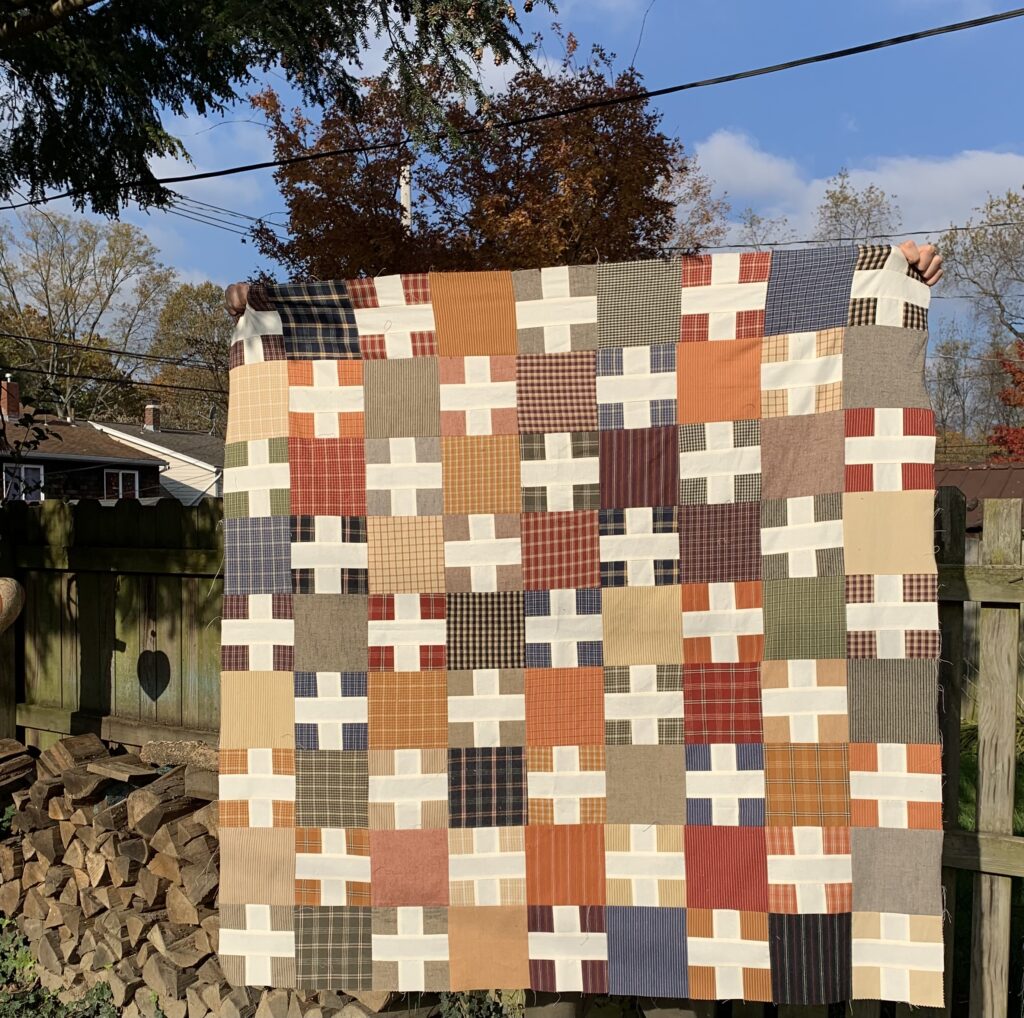
In the meantime, I finished the top of the Gratitude quilt, but just without the gratitude. I decided since I was not in love with this quilt it did not make sense to add the embroidery.

Rachel told me that this quilt would look great in a cozy, woodsy lakeside cabin. I totally agree! Thinking about this quilt there made me much more excited about its possibilities. However, I do not currently have a cozy, woodsy lakeside cabin and so for now I will fold this top and put it away for some future day when it might have a better home. If I am ever able to put it into a cozy, woodsy lakeside cabin I will embroider #LAKELIFE in huge letters across it and feel extremely grateful.

This post is linked up at My Quilt Infatuation where you can find some very colorful quilting inspiration!

A Conversation About Quilt Design

Amanda: Hi!

Louie: Hi!

A: What is your name?

L: Louie.

A: How old are you?

L: Five.

A: How long have you been designing quilts?

L: For four years.

A: ??? . . . What were you thinking when you designed this quilt?

L: I was thinking Fall colors. And there is a maze. See those blue line thingies? And there are buffalos. There are fall leaf colors and leaf kites.

A: Why are there buffalos?

L: I just love buffalos.

A: Like the animal?

L: Yes. And the football team the Buffalo Bills.

A: And what did you write on the quilt?

L: I love you.

A: Why did you write that?

L: It’s for my mom.

A: ???

We have entered Louie’s second season of “drawing contest.” One night this week I was the judge and I couldn’t think of a challenge (we have already done haunted houses, ghosts, spiders, space ships, several different construction vehicles…). Since I always have quilts on the brain I threw down the quilt design challenge! As the contestants were drawing I announced that the winner of this challenge would have their design made into an actual quilt by me! (I have been watching a lot of “Making the Cut” lately). Louie won, of course.

I’m sure I could have not made the quilt and he would not have mentioned it again. But, I felt like because I said I would do it I should do it. And, I always try to find ways to inspire his creativity. So, I pushed aside the two quilts waiting to be pieced on my sewing table and busted out Louie’s mini quilt.

Top, design. Bottom, quilt.

When I was thinking about how to make the “maze,” or the blue line on the quilt, I thought this would be a good opportunity to try to use a thicker quilting thread. I have two projects in the line up that I want to quilt with 12 wt. thread. Unfortunately, I didn’t have time to wait for an online order and Jo-Ann’s did not have anything thicker than 30 wt. Still, I could see the difference between 50 wt. and 30 wt. and I do think it was more visible in the quilting.

Which thread is the thicker thread?!

Even though this was a silly project, it was helpful to think about thread choice a little more and how using a different weight can change the look of the quilting. Now I am excited to order that 12 wt.!

In the meantime, Louie’s fall quilt is clearly the future of modern quilt design.

Heroes in a (Quilted) Half Shell

Happy Halloween!

Louie and Walter decided to be Teenage Mutant Ninja Turtles for Halloween, which was odd because neither of them have ever seen the show or movies. Nonetheless, Rachel and I found a way to turn this costume into a quilt, of course!

Luckily, the remnants section at Jo-Ann’s had some very inexpensive vinyl material that looked turtle-ish. I actually cannot imagine what this material could be used for besides a turtle shell.

We cut out larger and slightly smaller hexies in the different greens and put a little stuffing inside each “hexie sandwich” to give the shell some volume or dimension. Then, we pieced the hexies. I’ve never machine pieced hexies before, but after a quick YouTube tutorial it wasn’t too bad!

We then eyeballed these creations and cut them into ovals. We added a backing, and stuffed it with polyfill. Then, we binded it using the same machine binding tutorial from Cluck Cluck Sew that I use for most of my quilts. Machine binding a stuffed turtle shell with several layers of strange vinyl material was tough! Thank you to our Juki’s for powering through this task!

For the fronts, we used four layers of batting and quilted them with a pattern called “turtle pecks and abs.” Rachel, let’s make a note to quilt all future quilts with “turtle pecks and abs.”

And bam! We have quilts.

Louie has already started thinking about his costume for next year. While he was falling asleep he said, “well mom, you have a whole year to work on my next costume now.” You got it, babe!

National Cat Day is a Thing

And it’s today! I myself am not a “cat person,” but I will use this opportunity to honor my most favorite cat lover, my dear Megan.

The second quilt I ever made was for Megan (the first one was for my dog, Wallace). She requested a “cat quilt” because she really does love cats.

These fabric selections…yeesh.

The one and only picture I have of this original cat quilt is one Megan sent me of her sitting under it. In 2012, I wrote this about this quilt: “i dove in to free-motion quilting today.  i’m not sure it’s fun.” I am still unsure.

My second cat quilt was for my dear Joanna, who happens to be the daughter and cat lover protégé of Megan. JoJo’s quilt was the first quilt I came up with in my imagination and so it’s maybe a little strange, but I hope JoJo can forever look at it and think: that’s from my weird Aunt Amanda.

Apologies for my poor picture quality!

This is a silhouette of a cat reaching toward the moon because ??? I have no idea. In any event, the moon was so fun to make! It is a New York Beauty block pattern from an Etsy shop called Tobacco Shed Quilts.

Some of the moon fabrics are from my stash, but I bought some Mineral Linen fabric from Purl Soho to make the moon a little bit shiny!

The night sky was made from many charm packs purchased from Missouri Star Quilt Company. I kept using up all of the fabric and ordering more of the same charm packs. To the shipping person at Missouri Star Quilt Company, if you were thinking that this person must have no clue how much fabric she needs to complete their quilt project, you were 100% correct. I used a series of free foundation pieced patterns I found online to make the night sky, but unfortunately I cannot recall where on the internet I found them so I can’t give credit to the person who created them!

The cat block is from Quilt Art Design. Janeen van Niekirk has so many fun and amazing patterns. (I just got very distracted scrolling through the patterns of hers I want to try next.) I was really intimidated to make the cat block because I’d never done piecing that intricate before, but the pattern was so good it was surprisingly easier than expected!

I remember working on this in Rachel’s sewing studio, a.k.a. her dining room table.

For the quilting, I did some outlining on the moon and the cat and made random, diagonal lines all over the night sky, which sort of matched the piecing in that section. For the outside border, I used a star quilting pattern from Quilting Made Easy, which, again, was actually pretty easy! Big thanks to all of the quilting innovators out there who can think up these patterns and tools that allow the rest of us to make our own creations!

Happy National Cat Day to Megan, JoJo, and all of the other cat lovers out there!

In addition to honoring this special holiday, this week I also cut up fabric for a Christmas quilt, Thanksgiving quilt, and put the finishing touches on Louie’s Halloween costume (which Rachel and I consider to be a quilt). So many holidays converging this week!

The Joys of Quilting in the Age of the Internet

Right after finishing the Halloweenish quilt, I had to quickly start the next project in order to 1. have any hope of finishing my ridiculous quilting goal for 2021, but more importantly, 2. catch up with the Suzy Quilts Holiday Party Sew Along!

This quilt checks off a lot of “firsts” for me. First Suzy Quilts pattern, first time buying a quilt kit, first time doing a sew along… it’s a fun adventure!

I love the Suzy Quilts blog and her Instagram, she makes such beautiful modern quilts, but she’s also very goofy and fun to watch. When I saw her Holiday Party pattern, and then the beautiful kits with Rifle Paper Company Christmas fabric, I wanted to make that quilt with that fabric.

Prettyyyyy and I managed to grab one of the last ones

Picking out fabric is usually one of my favorite steps in the quilting process, but for me, that’s often picking out a bunch of fabric from the same collection. With a quilt kit, there’s a lot less leftover fabric because they give you exactly what you need.

Getting exactly what you need is great in that it’s more economical and you don’t need to figure out what to do with a ton of leftover fabric, but it is stressful when cutting, because there is not much room for error! This pattern really stretches the FQs to the max!

Final sub-cut squares… basically zero room for error!

The super cool thing about the sew along is that Suzy has tested this pattern and has lots of tips in her weekly Instagram live, including how you might screw up and where to be extra careful. In Week 1, she points out that the cutting diagram for Color 2 is particularly tricky. It was! But since I knew that, I was extra careful about cutting and managed to get through it without any mistakes (at least none that I have noticed yet). Despite chanting “measure twice, cut once” every time I cut fabric, I almost always screw up.

Week 1 complete…at the beginning of week 3…

The task for Week 2 is making HSTs, which I love to do. I’m currently listening to an audiobook of Middlemarch, which requires more attention than what I normally listen to while quilting, but I think this will be an excellent pairing with the HST sewing.

This quilt is going to be a gift for someone who (I’m 99% sure) does not read the blog, but just in case I will keep it a secret.

Last but not least! We fired up the blog’s Instagram account this weekend, which allows me to connect with other quilters in the Suzy Quilts sew along (including Suzy, who is a prolific commenter on Insta and very encouraging). But even better, moms: you can follow us on Instagram and be alerted to the latest posts! The webmaster also tells me that he can add our Instagram feed to the blog. Thanks in advance, webmaster!

The Paris Quilt

I like the Halloweenish quilt, Rachel! I’m glad you did not let my curmudgeonly attitude toward holiday specific décor deter you. There are so many adorable Halloween fabrics and I am glad you decided to go for it! Also, I think the back looks very fall-like so you could always flip it for the full fall season!

I have to start blogging about quilts of the past because I do not quilt fast enough to have new quilt content on a regular basis. (This is why I need a quilt blogging partner!) Also, my mom reallllly wants me to blog about the quilt I made for her, which is the “Paris” Quilt.

My mom painted and decorated her home office last year and the colors in this quilt were supposed to match. She said she was calling it her “Paris” room, which I don’t know exactly why it’s a Paris room, but I guess she wants to feel Parisian while she sits and does her accountant work. I understand and support wanting to pretend to be in Paris at all times.

For the back of the quilt I used a panel with a map of Paris.

I thought this might be a birthday gift for my mom but when her birthday in early December came and went I thought, no matter, it will be a Christmas gift! I finished on Christmas Eve, mostly likely at 2:00 a.m. It’s a miracle Louie didn’t come down on Christmas morning and find that Santa didn’t come but mommy was passed out on the couch in the middle of hand-basting the binding. I love gifting quilts, but I am always struggling in the final stretch!

My biggest quilting regret on the Paris quilt was that I did not do any quilting on the pieced sections. In hindsight, I should have done the loopy FMQ over the pieced sections as well as the white background. My plan was to just do some straight line quilting in the pieced sections to help those stand out, but I ran out of time and I could not figure out a way to do that quickly enough. When I made Louie’s superhero quilt I figured out I could straight-line FMQ. This is not perfect, but then you don’t have to keep turning the quilt, which is faster. To this day sometimes I think about the Paris quilt and get mad about those non-quilted pieced sections!

Deciding how to quilt something is so hard. It’s at the end and I am usually pressed for time, which does not help. I worry that an all-over quilt pattern won’t allow the blocks to stand out. But then, that’s what led me to go crazy quilting Rachel’s baby quilt and I worried I over quilted it. (I’m sorry baby Buffalo, your quilt is v stiff.)

On the positive side, I did like how the FMQ on the white background turned out.

The white fabric has butterflies on it and so I outlined some of the butterflies along with the loops. Now, I will note that my mom didn’t realize there were butterflies at all, let alone quilted, until about a month ago. So, there is that.

The other mistake I made on this quilt is I did not have enough fabric for the backing! Backings require a LOT of fabric. I probably started making the backing two days before Christmas so I needed to make do.

I cobbled together some pieces I had left and I actually really liked how this backing came out! A lack of fabric requires innovation, I guess.

The pattern for this quilt is “Through the Looking Glass” by Jen Sorenson. I would love to make a Christmas quilt with this pattern. Perhaps I will begin that quilt now and hope to finish it by next Christmas. And I will try to finish it early enough to quilt those pieced sections!

Lastly, while scrolling through my photo library to find the pictures of this quilt I found pictures from last December when Rachel gave haircuts to everyone in the neighborhood on my porch. Oh global pandemic, the strange things you’ve made us all do.

Halloweenish Quilt

Remember my trip to the Cherry Pit in Sevierville TN? In addition to the scrap bag and Songbook layer cake, I also picked up a layer cake and a few random fat quarters from the Moda Kitty Corn collection. I thought that the prints were so cute, the kitten with the shawl? Or bow? posing with a carved pumpkin? Adorbs. (I am too allergic to cats to become a cat lady, buying kitten fabric is the next best thing.) “I’ll make a Halloween quilt!” I thought.

Cutie

Amanda and I have previously discussed why not to make a Halloween quilt. Halloween is just a day, and right after that day is done, we get rid of the spiders and bats and spooky things and move on to Thanksgiving (or if you’re me last year during our first pandemic fall, you move straight to Christmas, because you need all the cheer). One could put out a Halloween quilt at the beginning of October, but that’s only a month! We were discussing how much we loved the Cluck Cluck Sew bat quilt pattern but didn’t want to commit to a Halloween quilt.

But… I bought the Kitty Corn layer cake anyway, despite the very good arguments against Halloween quilts.

Bats!

I do love bats, and I considered using that pattern for this quilt, but my goal of SPEED SPEED SPEED this year led me to this free layer cake pattern from the Fat Quarter Shop. As promised, this “shortcut” pattern came together super quickly. I thought that I might get it done at the beginning of October, as I started working on it right after I finished the King, but many things got in the way: work, quarantining/virtual school facilitation, and Halloween costume sewing.

Back at it

Since the pattern was so simple, and there was a bit of open space between the blocks, I thought it would be a good chance to practice some FMQ. I picked up some orange and green thread when I was buying some material for Helen’s Halloween costume (she is going to be a vampire and wanted a purple cape). I found some tutorials online for making spiders and webs, and pumpkins are one of the few things that I can doodle, so I just improvised those in the centers of the “custard” blocks.

You can see the crazy spiders in the block that is top-center… not great

I put the spiders on the print blocks, which ended up being good because they looked a little weird, but the black thread blends in and the spiders aren’t too noticeable. I was going to put webs all over the rest of the black background fabric, but then I decided to go with a “less is more” approach and just did a few webs and then stippling with black thread for the rest of the background.

More FMQ practice
Sorry I’m not home right now…

The quilting is not close to perfect, but I’m still pretty happy with how this turned out. I like the black background fabric, the colors and prints really pop.

Photo credit to my daughter Helen, who also made the coffin/candy sign from a shoe box, at bottom right

This was the first time I used an 80/20 cotton/poly batting because I wanted a bit more loft, but it really didn’t puff up much. In fact, I can’t tell a difference between this and 100% cotton, so maybe 80/20 is my new go-to, as it is less pricey and was quite easy to work with.

I wanted to be economical with the back, so I used a couple of leftover 10 inch squares from the layer cake, some of the extra fat quarters from the collection that I had grabbed, some squares from the scrap bag, scraps from my stash, and then pieced together some of the trimmings into squares. It’s quite scrappy and the colors aren’t a perfect match, but it works.

Scrap buster back

I folded and pulled the backing fabric onto the front for the binding, and managed not to cut into it while trimming the batting, so that was a win.

This quilt is now draped over our couch and I love it. It’s going to stay there until at least Thanksgiving. It’s not too obviously a Halloween quilt, aside from the jack o lanterns and candy corn… so I’m going to call quilt number 9 my Halloweenish quilt.

Yay, baby!

I’ve previously joked to Rachel that her post about this quilt would be so lovely and then mine would be:

When Rachel, my awesome friend who is also a quilter, told me she is having a baby I was like “yessssssss! quilt!!!!!” And then also, of course, I was very happy for her and her family. And no, I was not going to full bunny blast a charm pack for baby Buffalo. (Not that there is anything wrong with that!)

This past Mother’s Day I gifted myself Electric Quilt 8. I turned to this for baby Buffalo’s quilt and, while I still do not really understand how to use that software, it was helpful to try a few designs out. My inspiration was this “friendship” quilt my cousin had as a child. It was faces of little girls with my cousin and her friend’s names embroidered under the faces. (Megan, someday can you send me a picture of that quilt to post here?)

As Rachel says, our neighborhood is a wonderfully crazy place and I wanted this quilt to be something like a friendship quilt. I stumbled upon the “medallion” quilts on Electric Quilt 8 and that helped me decide to have one larger block in the middle with a square directly in the center, with different borders around that center. As Rachel says, the square is for our neighborhood, Regent Square, and I knew it would be green to represent the park next to our houses because that space is where we all gather and one of the reasons, I think, our street is so special. (Example, it was in that park at another kid’s birthday party that Rachel said she was pregnant with Walter and I was like, no way! I am also pregnant! And then our babies were born two weeks apart. Alas, that is not happening this time).

Anyways, back to the quilt. So then around the square-centered block I wanted there to be kids and then houses because that is Richmond Street in a nutshell. Or, I suppose, in a quilt.

I had a surprisingly difficult time finding a pattern for a kids quilt block, but I ended up using a foundation pieced pattern from Etsy.

I started sewing the kids blocks when we were on vacation in the Finger Lakes in August. This was basically my most perfect day–quilting by a lake while Nick entertained Louie on a jet ski. I spend a lot of time now trying to figure out how to make this day happen on a more regular basis.

Perfection
Can I quit my job, buy a lake house, and do this all day, every day? No, sadly I cannot.

Anyways, this is going to be the longest post ever. For the houses, I used this free pattern called “Village.” The tree corner blocks were a foundation pieced pattern I found in Electric Quilt 8. So, I made all of those blocks and then I still had no middle block! Originally, I did find a block in Electric Quilt 8 that I was planning to use but then for some reason I decided it would be better to not follow the plan and do something else? That made things…more difficult.

So I abandoned the quilting software for a moment and bought two books!

Rachel, these are great books which you can borrow anytime!

In one of these books I found a “pickle dish” block, which I thought would be a great center block! The issue was that the pattern in the book was too large for the center space I had to work with. I could have made more kids and house blocks and increased my center space, but I couldn’t do math well enough to figure out how that would work. Instead, I sent Nick to his office with this pattern and had him reduce the size on the copier to make it fit into my center space. Nick said only one person questioned him during this process, so it was all good!

The pickle dish block was fun to make, though time-consuming! I would like to try this block again sometime. But, this time it just did not come out looking great. When I laid out the quilt with the other blocks I really disliked it. I sent a picture to my mother, who is always so supportive, and she was like, that looks terrible. So then I decided to scrap that block and start over! It was just like an episode of Project Runway where someone decides to start a whole new look halfway through the episode! Nick was just yelling, “you’re getting rid of the pickle dick?!” It was a dramatic night.

Many things happening in this room.

Then I consulted google (I went from expensive quilting software to books to googling…) and found a “churn dash” block and started making that which was way simpler but I liked it way better! I felt like the simplicity didn’t distract as much from the other border blocks. I appliqued the little bunny in the square to be like a “you are here” thing for baby Buffalo. Hey baby, you are here right in the middle of this delightful chaos!

But then! after it was all sewn together, I sent another picture to my mother with the original pickle dish center laid on top and we were both like, “well that doesn’t look too bad!”

I still think I like the simpler, churn dash center, or maybe I am just telling myself that because I could not rip apart the quilt at that point. One day I am going to make a quilt just out of all of my rejected blocks and the pickle dick can be in the center of that quilt.

As with every quilt I make, I learned many things I would do differently next time. I could go on and on and on about all of those things, but I will just leave it at I was very glad to make a special quilt to welcome the new Wilson baby to our neighborhood! Sometimes Rachel comes over to my house to snuggle Wallace. I look forward to going to her house to snuggle that baby!

How to Gift the Perfect Quilt

It doesn’t feel right that I should be the one to reveal Amanda’s secret project, but I’m going to do it anyway!

Over the past few weeks (emphasis on few), Amanda has been telling me vague details about this secret project, and (it seemed to me) prepping me to receive some kind of flawed product. Dear readers, and by readers, I mean, our mothers, Amanda is insane, because after closely inspecting this beautiful quilt, I only see perfection. It is amazing, and I am embarrassed to say that I cried when she gave it to me this weekend.

Perfection

For those of you who may not know, I’m going to have a baby in a few months, and as you should know by now, the best thing about people having babies is an excuse to make a cute baby quilt. However, does Amanda grab a couple of charm packs and full bunny blast together a baby quilt in a few days? No she does not. Well, maybe she has in the past but she did not do this for the baby that we are calling Buffalo, which her son suggested as a name.

Amanda and I live in a very special neighborhood, as you can see by our blog cover image, which depicts a bunch of willing but also coerced neighbors holding up our quilts in the parklet where we often hang out. There are so many kids running around, it’s sort of ridiculous to add to the child population, but it’s a great feature of our street (even though they often drive us crazy). She tells me that the center churn dash block represents the parklet (and omg look at the cute little bunny!! She knows I love bunnies). This was originally going to be the pickle dick block, which she promises to show me someday.

Adorable

And around the parklet churn-dash block are 12 adorable pieced child blocks… Amanda HOW DID YOU DO THIS?! And then surrounding those are houses, reminiscent of those in our neighborhood, and tree blocks in the corners (we are lucky to live on tree-lined brick streets and next to Frick Park). The quilt is a square! Because our neighborhood is Regent Square.

As I looked closely at the houses, I noticed that she had FMQed little bricks and pebbles onto some of them…

Amazing

I don’t know how many late nights Amanda spent working on this quilt, but I’m guessing she is even more sleep deprived than me. I kept exclaiming “how did you DO this?” Amanda, I hope you will write a follow up post and tell us how you did it.

The colors are perfection, the piecing and quilting are incredible, and it has a lovely minky backing, so I want to both display this quilt on my wall but also snuggle it.

THANK YOU AMANDA for all of the hard work that you put into this beautiful gift. I feel so special, and so happy for baby Buffalo, the luckiest baby in the world.

Here are some snaps from our weekend trip to Lake Chautauqua, with a stop on the way to pick grapes. Amanda and some of our other neighborhood mom friends planned this getaway as a celebration of baby Buffalo. I think I might be the luckiest mom in the world?

Thanks again, Amanda, you’re the best. <3

KING

A few posts ago, I showed a sneak peek of the quilt top for what I thought would be quilt number 8. Then I decided to abandon that springtime quilt for an autumnal quilt for my bed, which is king size. The giant Christmas throw I have on there now covers the bed sufficiently, but I wanted to see if I could handle making a king size quilt.

I was on vacation a few months ago in Tennessee, and on one rainy morning I left everyone behind to go to the Cherry Pit, a lovely quilt shop in Sevierville. This place was adorable, and the people working there were so kind. I picked up a couple of layer cakes and also this bag of mystery scraps.

Oooooo a mystery … I thought I took a picture of the actual scraps, but I guess I didn’t.

One of the layer cakes was from the Moda Songbook collection, which had some really lovely, whimsical floral prints that I liked. I wasn’t sure what I was going to do with it, but I had some other florals and was kicking around the idea of a fall quilt, and I decided that the layer cake would be the perfect thing to pull it all together.

I used Amy Smart’s lattice quilt pattern again, which I used for the Michigan and Ohio quilts. It comes together super fast, and this time I wasn’t fussy cutting the fabric on the bias to make directional print blocks with the points facing up, if that makes sense. So it went even faster. Precuts baby!

I initially planned to use this teal floral for the cornerstones (the little tiny squares), but after I cut them all out and laid out the fabric on the floor, the color combo didn’t look right.

In fact, it kind of made me feel nauseous. I opted instead for a few foresty greens and grayish greens that came from the mystery scrap bag, and also took out the larger pale teal floral blocks. Now I need to figure out what to do with all of those tiny teal squares…maybe another lattice quilt is in my future.

Basting this thing was a challenge. My house is not that big, but I was able to fit the backing (just a solid backing for this) on the living room floor with the furniture either pushed against the wall or into the dining room.

Look at you, big boy!

I texted a picture of this to Amanda and told her that I broke a sweat while crawling around and basting it. It took forever, but I had to do it in one night, because it was blocking the path to the kitchen.

Walk, don’t run

I got a new walking foot for this quilt, a Janome, which another quilt blogger mentioned worked on her Juki TL2010Q. I wondered if I broke my walking foot because I was trying to use it at full bunny? I quilted this at half bunny/half turtle and didn’t break the foot. It didn’t take too long either. I used a hera marker to make creases for the quilting lines, and I was quite happy with how it turned out. FMQ on this size would have been challenging, but I think doable!

I was going to try to bind this with the backing material, but I immediately cut a hole in it when attempting to cut the batting, so I ended up binding it with the same fabric I used for the sashing, which I think looked nicer anyway.

At least I did this immediately instead of at the end

I actually finished this quilt last weekend, but didn’t get a chance to photograph it until today. Turns out it’s hard to photograph a king size quilt. I found some clamps that I think my husband bought during his pandemic foray into carpentry. I really needed slightly bigger clamps to get this thing a few more inches off the ground, but this was the best I was going to do. My neighbors probably think I’m insane.

If you look closely, you’ll see some bunnies, which are from a fat quarter that Amanda gifted to my daughter. I’m sorry Amanda (and Helen), I think I’ve stolen almost all of that fabric for my own quilts.

Bunnies <3

Eight is great! Eight is king! Welcome fall. My bedroom is ready.